

Graduation Dessert Charcuterie Board Recipe
Celebrate your special milestones with this delightful Graduation Dessert Charcuterie Board! Bursting with colors, textures, and flavors, this board not only looks impressive but is incredibly easy to assemble. Perfect for your graduation party, or any gathering, it’s a sweet way to indulge and share moments with your loved ones.
Why You’ll Love This Recipe
- Visual Appeal: The vibrant colors and variety of treats make it a showstopper.
- Customizable: Tailor your board with favorite sweets, fruits, and snacks.
- No Cooking Required: Simply assemble your chosen ingredients, making it a breeze.
- Perfect for Sharing: Great for gatherings—everyone can pick and choose their favorites!
- Versatile: Suitable for any occasion, not just graduations!
Ingredients
- Assorted chocolates: Use your favorites like dark, milk, and white chocolate for variety. Consider fun shapes or even chocolate-covered fruits.
- Fresh fruits: Strawberries, blueberries, and grapes add freshness and a burst of flavor. Feel free to swap for whatever is in season!
- Dried fruits: Apricots, cranberries, and figs bring sweetness and a different texture. Great for adding color to your board!
- Cookies: Mix it up with classic favorites such as Oreos, buttery shortbread, or soft-baked cookies. They’ll be a hit!
- Nuts: Almonds, walnuts, or pecans introduce a satisfying crunch. If nut allergies are a concern, omit entirely or use seeds like pumpkin or sunflower.
- Cheeses: Creamy Brie or tangy Cheddar can pair beautifully with sweets. If someone is lactose intolerant, consider vegan cheese options.
- Crackers: Choose a variety of textures like crispbread, buttery crackers, or even pretzel crisps for a salty balance.
Full measurements are in the recipe card below.
How to Make the Recipe
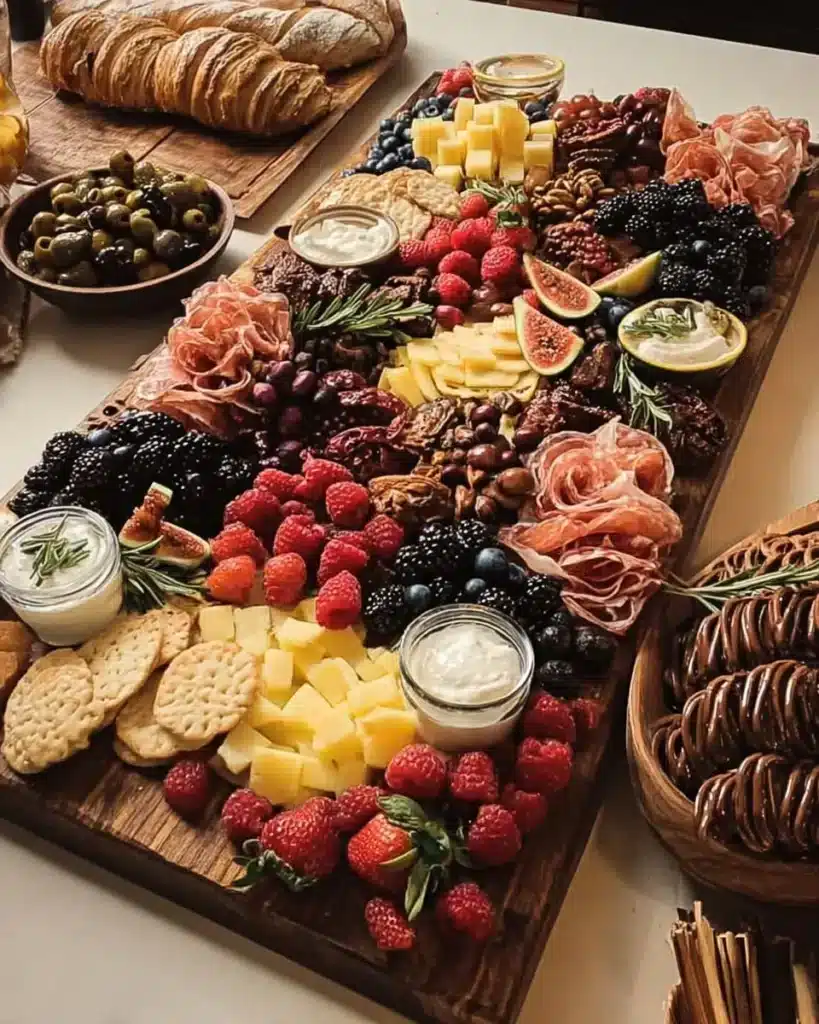
- Prep Your Board: Start with a large wooden or slate board to set the scene. The bigger, the better!
- Arrange the Base: Place clusters of fresh fruits in one section of the board. These will act as both decoration and tasty bites.
- Add the Cheeses: Cut cheeses into wedges or slices and arrange them near the fruits.
- Add the Sweet Treats: Scatter assorted chocolates and cookies in the remaining spaces, creating a beautiful mix of colors and heights.
- Fill Gaps with Nuts and Crackers: Add small bowls or piles of nuts and crackers to fill any gaps and provide that satisfying crunch.
- Finish with Dried Fruits: Finally, sprinkle dried fruits throughout the board for pops of color and chewy goodness.
Pro Tips for Making the Recipe
- Mix Textures: Combine crunchy, creamy, sweet, and savory items for a well-rounded board.
- Keep it Balanced: Ensure you have a good mix of salty and sweet to please everyone’s palate.
- Use Seasonal Fruit: Choose fruits that are at their peak for the best flavor and freshness.
- Cut Uniformly: Try to cut cheeses and fruits to a consistent size for a polished look.
- Don’t Overcrowd: Leave some space on the board to avoid a messy appearance and make it easy for guests to serve themselves.
How to Serve
Serve your graduation dessert charcuterie board on a large table so guests can easily gather around. A glass of sparkling cider or champagne pairs perfectly with this spread, making it a festive celebration. Use small dessert plates or napkins for easy handling!
Make Ahead and Storage
- Fridge Storage: You can prepare the board a few hours ahead. Cover it tightly with plastic wrap and refrigerate. It’s best enjoyed fresh, though!
- Freezing: Most components can be frozen separately, but assemble the board right before serving for the best texture and taste.
- Reheating Tips: If you have leftover baked goodies, warm them slightly in the oven before serving again for that fresh-baked aroma.
FAQs
Can I make this board the day before?
Yes! It’s best to assemble it a few hours ahead, but try to keep fruits from browning by adding lemon juice.
What can I use if I don’t like cheese?
Feel free to skip the cheese or use dairy-free alternatives!
How do I prevent fruits from browning?
A light spritz of lemon juice helps keep fruits like apples and bananas looking fresh.
Can I customize the ingredients based on dietary restrictions?
Absolutely! You can easily cater to gluten-free, vegan, or nut-free diets by swapping in appropriate ingredients.
Now grab your favorite treats and get assembling — your graduation dessert charcuterie board is waiting to impress! Happy celebrating!
Graduation Dessert Charcuterie Board
Ingredients
Method
- Start with a large wooden or slate board.
- Place clusters of fresh fruits in one section of the board.
- Cut cheeses into wedges or slices and arrange them near the fruits.
- Scatter assorted chocolates and cookies in the remaining spaces.
- Add small bowls or piles of nuts and crackers to fill any gaps.
- Sprinkle dried fruits throughout the board for color and chewy goodness.