
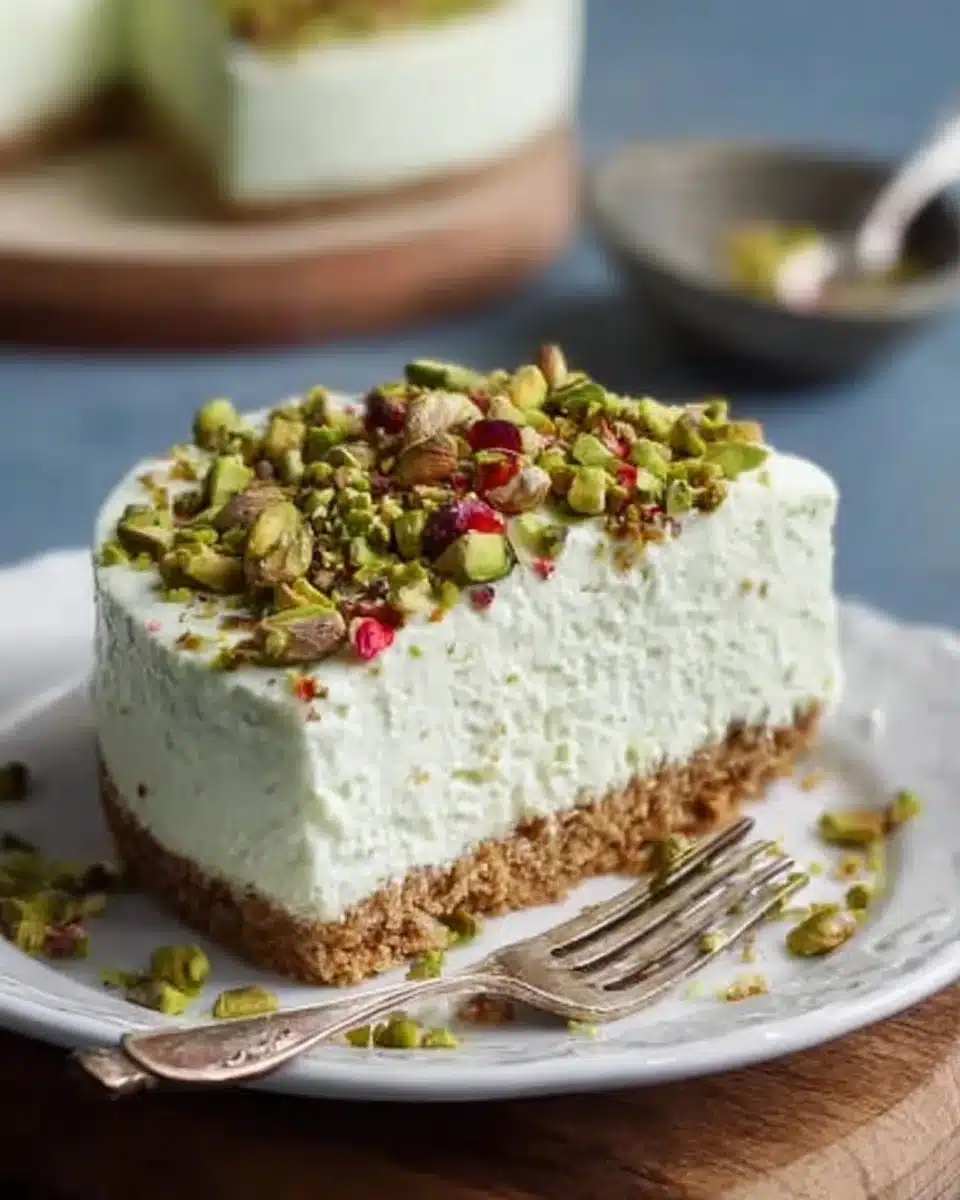
No-Bake Pistachio Cheesecake Recipe
If you’re looking for a dessert that comes together effortlessly while delivering a punch of flavor, you’re in the right spot! This No-Bake Pistachio Cheesecake is creamy, dreamy, and has just the right amount of nuttiness from the pistachios. With a buttery crust and a rich filling, it’s perfect for any occasion—even a cozy weeknight treat!
Why You’ll Love This Recipe
- No baking required: This cheesecake is simple and fuss-free, perfect for those warm days when you don’t want to turn on the oven.
- Light and creamy texture: The filling is luscious yet airy, making it a delightful end to any meal.
- Unique flavor: The nuttiness of pistachios sets this cheesecake apart from traditional flavors, giving it a fun twist.
- Great for gatherings: Impress friends and family with this stunning dessert, and it slices beautifully for serving.
- Easy prep: With minimal ingredients and steps, you’ll have more time for what really matters—enjoying delicious food!
Ingredients
- Cream cheese: Adds creaminess and tang. Make sure it’s at room temperature for easy mixing.
- Heavy cream: Whipped to fluffy perfection, it lightens the filling. Coconut cream could work as a dairy-free option!
- Pistachio pudding mix: Provides flavor and thickening. You can swap for vanilla pudding if you prefer a different taste.
- Powdered sugar: For sweetness—it blends smoothly and won’t leave a gritty texture.
- Crushed graham crackers: Forms the base of the cheesecake. Digestive biscuits or Oreos can be a fun alternative!
- Melted butter: Helps bind the crumbs together for the crust. Use coconut oil for a dairy-free version.
Full measurements are in the recipe card below.
How to Make the Recipe
-
Prepare the crust: In a mixing bowl, combine the crushed graham crackers and melted butter. Mix well until crumbly and then press the mixture firmly into the bottom of a springform pan. Refrigerate while making the filling.
-
Make the filling: In a large bowl, beat the cream cheese until smooth. Add the pistachio pudding mix and powdered sugar, and mix until fully combined.
-
Whip the cream: In another bowl, whip the heavy cream until stiff peaks form. Gently fold the whipped cream into the cream cheese mixture until smooth and airy.
-
Assemble: Spoon the filling over the prepared crust and smooth out the top. Cover with plastic wrap and refrigerate for at least 4 hours, or overnight for best results.
-
Serve: Once set, carefully release the cheesecake from the springform pan. Slice into pieces and garnish with chopped pistachios or whipped cream if desired. Enjoy!
Pro Tips for Making the Recipe
- Chill your tools: For extra fluffy whipped cream, chill your mixing bowl and beaters beforehand!
- Don’t skip the fridge time: Allowing the cheesecake to set properly is key to a good texture. Patience pays off!
- Make it colorful: Add a splash of food coloring to the filling for a fun, vibrant look!
- Consider flavor variations: Swap out pistachio pudding for flavors like almond or chocolate for a different twist.
- Check for lumps: Make sure the cream cheese is super smooth before folding in the whipped cream to avoid lumps in your filling.
How to Serve
This cheesecake is delightful on its own but pairs beautifully with a drizzle of chocolate or caramel sauce. You could also top it with some fresh berries or a dollop of whipped cream for an extra treat!
Make Ahead and Storage
- Fridge storage: Cover tightly with plastic wrap and store in the refrigerator for up to 5 days.
- Freezing: This cheesecake freezes well! Just wrap it tightly in plastic wrap and then in foil. It can be stored in the freezer for up to 3 months. Thaw in the fridge overnight before serving.
- Reheating tips: No reheating necessary! Serve it cold right from the fridge for the best texture.
FAQs
Can I use a different nut for the crust?
Yes! Almonds would work beautifully, or you could even try hazelnuts for a unique flavor.
What if I can’t find pistachio pudding mix?
You can use vanilla pudding mix and stir in some crushed pistachios for flavor.
Can I make this cheesecake dairy-free?
Absolutely! Use dairy-free cream cheese and coconut cream for the whipped topping.
How long does the cheesecake need to set?
While 4 hours is the minimum, overnight is even better for a firmer texture.
Now, gather those ingredients and give this No-Bake Pistachio Cheesecake a try. You won’t regret it! Happy cooking!

No-Bake Pistachio Cheesecake
Ingredients
Method
- In a mixing bowl, combine the crushed graham crackers and melted butter. Mix well until crumbly and then press the mixture firmly into the bottom of a springform pan. Refrigerate while making the filling.
- In a large bowl, beat the cream cheese until smooth. Add the pistachio pudding mix and powdered sugar, and mix until fully combined.
- In another bowl, whip the heavy cream until stiff peaks form. Gently fold the whipped cream into the cream cheese mixture until smooth and airy.
- Spoon the filling over the prepared crust and smooth out the top. Cover with plastic wrap and refrigerate for at least 4 hours, or overnight for best results.
- Once set, carefully release the cheesecake from the springform pan. Slice into pieces and garnish with chopped pistachios or whipped cream if desired. Enjoy!