
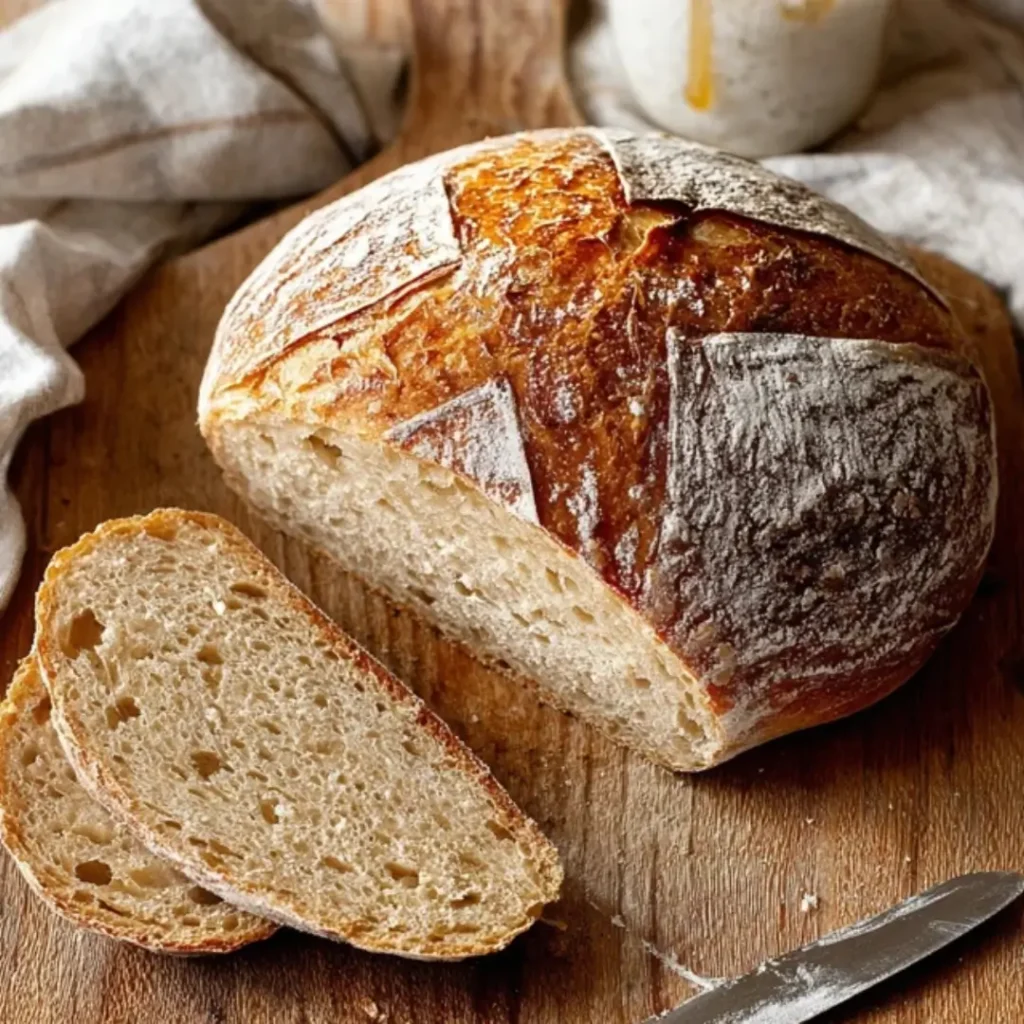
Oh, friends, there’s nothing quite like the comforting aroma of freshly baked bread wafting through the kitchen, is there? It’s a scent that instantly transports me back to my grandmother’s bustling kitchen, where every Sunday, a new loaf seemed to emerge from the oven like magic. Today, I’m so excited to share a truly special recipe with you: our Easy Sourdough Discard Bread. This simple no-knead loaf has a beautifully soft interior and a delightfully rustic crust, offering a wonderfully subtle tang that makes every bite a pure joy.
I remember countless afternoons, my small hands dusted with flour, watching Grandma work her dough. Sometimes, things didn’t go as planned, but she always taught me that every “mistake” was just a step on the path to a delicious discovery. Learning to bake from scratch, experimenting with new techniques, and then finally sharing those sweet, warm creations with loved ones – that’s the heart of what I do here at recipesdessert.net. It’s about more than just food; it’s about creating cherished memories.
This Easy Sourdough Discard Bread recipe is a testament to that spirit. It’s incredibly approachable, even for beginners, requiring minimal effort but yielding maximum reward. Perfect for sharing with family, it brings people together around the table. My top tip? Don’t be afraid to get your hands a little messy; that’s where the real fun begins, and it’s how you truly connect with your bake!
What You Need to Make This Recipe
Crafting this delightful loaf starts with humble ingredients, proving that extraordinary flavors often come from simplicity. Our key players are all-purpose flour for that perfect texture, active dry yeast to give it a wonderful lift, and of course, your sourdough discard, which brings an incredible depth of flavor to this Easy Sourdough Discard Bread. The full list of ingredients and precise measurements are detailed in the recipe card below.
How to Make Easy Sourdough Discard Bread
Baking this Easy Sourdough Discard Bread is a wonderfully straightforward process, designed for ease and enjoyment. You’ll begin by gently combining your ingredients to form a shaggy dough, letting time and fermentation do most of the work during a generous first rise. A simple shaping transforms it into a beautiful loaf, followed by a second, shorter proof, and then into the oven it goes, emerging golden and glorious. It’s a truly rewarding journey from bowl to fragrant, crusty bread.
Easy Sourdough Discard Bread
Ingredients
Equipment
Method
- In a large mixing bowl, combine the warm water, sourdough discard, active dry yeast, and granulated sugar (if using). Stir gently and let sit for 5-10 minutes until the yeast is foamy. This indicates the yeast is active.
- Add the flour and salt to the wet ingredients. Mix with a sturdy spoon or your hands until a shaggy, cohesive dough forms and there are no dry streaks of flour. It will be sticky.
- Lightly grease the same bowl (or a clean one) with olive oil. Place the dough in the greased bowl, turning it once to coat. Cover the bowl tightly with plastic wrap or a damp kitchen towel.
- Let the dough rise in a warm spot for 2-3 hours, or until it has visibly increased in size and looks bubbly. The exact rise time will depend on your room temperature and the activity of your discard.
- Gently turn the dough out onto a lightly floured surface. Using a bench scraper or your hands, gently fold the edges of the dough towards the center a few times to create a round shape with some tension on the surface. Avoid overworking the dough.
- If using a Dutch oven, cut a piece of parchment paper slightly larger than your dough. Carefully place the shaped dough onto the parchment paper. If not using a Dutch oven, you can place it directly on a baking sheet lined with parchment.
- Cover the dough loosely with plastic wrap or an inverted bowl. Let it proof for another 30-60 minutes, or until it looks puffy but not overly gassy. You can perform the ‘poke test’: gently poke the dough with a floured finger; if it slowly springs back, it’s ready.
- About 30 minutes before the end of the second rise, preheat your oven to 450°F (230°C). If using a Dutch oven, place it with its lid in the oven to preheat. If not using a Dutch oven, place a baking sheet in the oven and an empty, oven-safe tray on the bottom rack.
- Once the oven is preheated and the dough is proofed: Carefully remove the hot Dutch oven from the oven. Using the parchment paper as a sling, carefully transfer the dough into the hot Dutch oven. Score the top of the dough with a sharp knife or razor blade (a simple cross or slash works well).
- If not using a Dutch oven: Carefully transfer the dough on its parchment to the preheated baking sheet. Pour about 1 cup of hot water into the empty tray on the bottom rack (this creates steam for a crispy crust).
- Bake with the lid on (or with steam) for 30 minutes. Then, remove the lid (or the water tray) and continue baking for another 10-15 minutes, or until the crust is deep golden brown and sounds hollow when tapped on the bottom.
- Carefully remove the bread from the Dutch oven (or baking sheet) and transfer it to a wire rack to cool completely before slicing. This is crucial for the internal crumb structure.
Notes
Pro Tips for Making This Easy Sourdough Discard Bread
Achieving that perfect loaf of Easy Sourdough Discard Bread is all about understanding a few simple nuances. I’ve learned these tricks over years of baking, sometimes through trial and error, and they make all the difference.
The Right Consistency for Your Dough
Don’t be tempted to add too much extra flour during the initial mixing. This dough is meant to be a bit sticky and shaggy. Over-flouring can lead to a dense loaf, and we want that lovely, open crumb. Trust the process; it will come together beautifully.
My Secret Trick: The Warm Rise
I always ensure my dough has a warm, draft-free place for its first rise. If my kitchen is cool, I’ll often put it in an oven that’s been very lightly warmed then turned off, with the door slightly ajar. This consistent warmth helps the yeast and sourdough discard work their magic, giving your Easy Sourdough Discard Bread a fantastic lift and a wonderfully airy texture.
Gentle Handling is Key
When you’re ready to shape your loaf, be gentle. Avoid deflating the dough too much. A light touch helps preserve those precious air bubbles that developed during the bulk fermentation, contributing to the bread’s delightful texture.
Patience for the Perfect Crust
Resist the urge to peek too often while your bread is baking. The consistent heat is crucial for developing that beautiful, golden-brown crust. Waiting until the recommended bake time ensures both a perfectly cooked interior and a satisfyingly crisp exterior.
Fun Variations for Easy Sourdough Discard Bread
One of the greatest joys of home baking is making a recipe truly your own! This Easy Sourdough Discard Bread is a fantastic canvas for your creativity. My sister always asks me to swirl in something extra, and I love seeing what delightful twists my friends come up with.
Herb & Garlic Infusion
For a savory delight, try incorporating 2 tablespoons of finely chopped fresh rosemary and 2 cloves of minced garlic into the dough during the initial mixing. The herbaceous notes pair beautifully with the subtle tang of the sourdough, creating an aromatic loaf perfect for dinner.
Cheesy Goodness
Who doesn’t love cheese? For a wonderfully rich bread, fold in ½ cup of shredded cheddar or a robust Gruyère during the shaping step. The cheese melts into pockets of savory goodness, making this a favorite in my house for a quick snack or a side with soup.
Seeded Sourdough
Add a delightful texture and nutty flavor by mixing in 2 tablespoons of a seed blend (like sunflower, pumpkin, and flax seeds) into the dough. You can also sprinkle some extra on top before baking for a lovely visual and textural crunch. A friend loves when I do this!
What to Serve With Easy Sourdough Discard Bread
This rustic and comforting Easy Sourdough Discard Bread is incredibly versatile, making it the perfect accompaniment to so many meals and moments. I love serving it with a simple pat of salted butter, but here are a few other suggestions that make this delightful bread shine.
Classic Butter and Jam
For a truly nostalgic experience, nothing beats a thick slice of this bread slathered with softened butter and your favorite homemade jam. My mom always pairs it with her blackberry preserves; it’s breakfast perfection!
Alongside Hearty Soups
Its robust crust and tender crumb make it an ideal companion for a warm bowl of soup or stew. Imagine dipping a piece into a creamy tomato soup or a hearty beef stew on a chilly evening. Pure comfort.
Olive Oil and Balsamic
For an elegant appetizer, serve slices with a small dish of good quality olive oil, perhaps a splash of balsamic vinegar, and a sprinkle of flaky sea salt. It’s simple, sophisticated, and lets the bread’s flavor truly sing.
As an Open-Faced Sandwich Base
Slice it thickly and use it as a base for open-faced sandwiches. A friend loves when I top it with avocado and a sprinkle of chili flakes. The sturdy texture of the Easy Sourdough Discard Bread holds up beautifully.
How to Store Easy Sourdough Discard Bread
To keep your wonderful Easy Sourdough Discard Bread tasting as fresh and delicious as the day it was baked, proper storage is key. A little care goes a long way in preserving that delightful texture and flavor.
Room Temperature Freshness
For short-term storage, up to 2-3 days, the best place for your bread is on the counter at room temperature. I like storing loaves in an airtight container or a clean linen bread bag to keep them from drying out. A plastic bag can also work, but sometimes promotes a chewier crust.
Freezing for Later Enjoyment
If you want to enjoy your Easy Sourdough Discard Bread for longer, it freezes beautifully. Once completely cooled, slice the loaf or wrap it whole tightly in plastic wrap, then an additional layer of aluminum foil. It can be stored in the freezer for up to 2-3 months.
Reheating for “Fresh” Bread
To reheat a frozen slice, you can pop it directly into a toaster. For a whole loaf, thaw it at room temperature, then refresh it in a preheated oven (around 350°F or 175°C) for 10-15 minutes, or until the crust crisps up again. A light misting of water before reheating can work wonders.
Nutritional Benefits
While we often think of desserts, baking bread at home, especially this Easy Sourdough Discard Bread, offers its own simple goodness. Using sourdough discard can contribute to a more digestible loaf, and homemade bread means you control the ingredients. It’s a treat that’s both satisfying and nourishing, offering a source of simple carbohydrates for energy, perfectly blending indulgence with wholesome ingredients.
FAQs
Faq 1
What is sourdough discard and why use it?
Sourdough discard is the portion of your sourdough starter that you remove before feeding it. It’s not as active as a fed starter but still full of flavor! Using it in this Easy Sourdough Discard Bread recipe is a wonderful way to prevent waste and add a subtle, tangy complexity to your bake.
Faq 2
Can I use active sourdough starter instead of discard?
Yes, you can! If you only have active sourdough starter, you can use it in place of the discard in this recipe. The results will be very similar, perhaps with a slightly stronger rise due to the increased activity. No need to let good starter go to waste!
Faq 3
Why is my Easy Sourdough Discard Bread not rising enough?
Several factors can affect the rise. Ensure your yeast is active and your water is warm (but not hot, as it can kill the yeast). Also, make sure your dough has a warm, draft-free spot for its rises. Patience with proofing times is crucial for a good lift.
Faq 4
Can I make this bread ahead of time?
Absolutely! This Easy Sourdough Discard Bread is fantastic for making ahead. You can prepare the dough and let it have its first rise in the refrigerator overnight. Just bring it back to room temperature before shaping and continuing with the second rise and baking.
Conclusion
Baking this Easy Sourdough Discard Bread is more than just following a recipe; it’s an invitation to bring a little bit of that homemade magic into your own kitchen. From its simple ingredients to its satisfying no-knead process, every step is a joy, culminating in a beautiful loaf that promises comfort and deliciousness. I truly hope you’ll embrace the warmth and reward of creating this delightful bread. It’s recipes like these that fill our homes with incredible aromas and our hearts with sweet, lasting memories. Happy baking, my friends!