
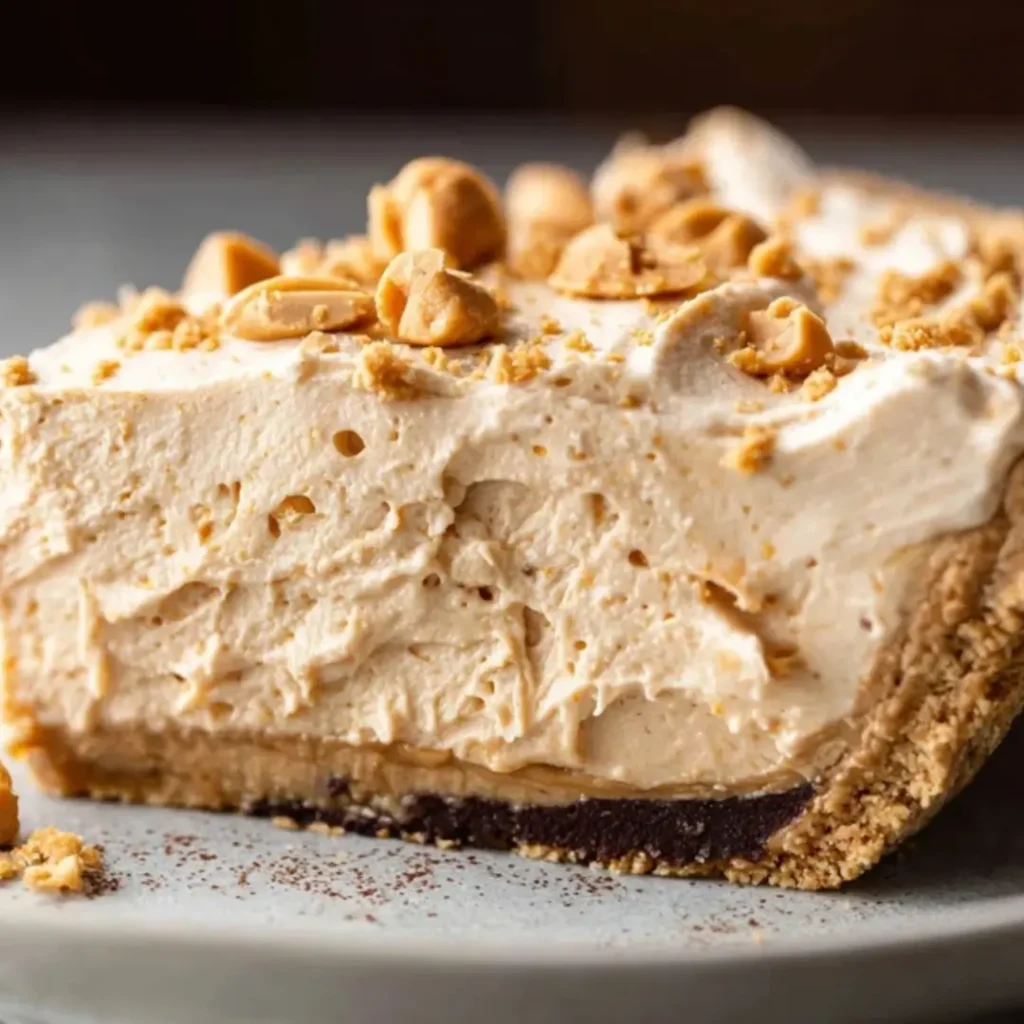
Oh, the magic of a perfectly creamy, utterly dreamy Peanut Butter Pie! There’s something so incredibly comforting about that rich, smooth peanut butter filling nestled in a crisp chocolate cookie crust. It’s a dessert that speaks of joyful gatherings, spontaneous celebrations, and those quiet moments when only a truly satisfying sweet treat will do. It’s truly a delight that makes hearts happy with every single bite.
I remember countless afternoons in my grandmother’s kitchen, the air thick with the scent of flour and sugar, and the joy of creating something delicious from simple ingredients. Later, as I experimented with flavors and textures in my own kitchen, I discovered the sheer delight of a no-bake wonder. This particular Peanut Butter Pie recipe brings back all those warm memories, with an effortless elegance that anyone can achieve.
This recipe is a true gem, offering a delightful escape from the oven, making it perfect for those warmer days or when you simply crave something extraordinary with minimal fuss. It’s incredibly family-friendly and guaranteed to bring smiles around any table. My top tip for any no-bake dessert is always to give it ample time to chill – patience is truly the secret ingredient here for that perfect set!
What You Need to Make This Recipe
Crafting this delightful Peanut Butter Pie begins with just a handful of simple ingredients. We’re talking about the rich, buttery graham cracker crumbs for our irresistible chocolate cookie crust, creamy peanut butter that forms the heart of our silken filling, and luscious cream cheese and heavy cream to create that signature “dreamy” texture. I always recommend using a good quality creamy peanut butter for that truly smooth, melt-in-your-mouth experience. You’ll find the full list of ingredients and precise measurements in the recipe card below.
How to Make Peanut Butter Pie
Making this Peanut Butter Pie is a wonderfully straightforward process that promises delicious rewards without turning on your oven. You’ll start by pressing together a simple, buttery graham cracker crust, then move on to whipping up the incredibly smooth and decadent peanut butter filling. Once combined, it’s all about assembling the pie in its crust and letting it chill patiently in the refrigerator until it’s perfectly set and ready to slice. It’s a true testament to how easy it can be to create a show-stopping dessert.
Creamy Dreamy No-Bake Peanut Butter Pie
Ingredients
Equipment
Method
- In a medium bowl, combine the graham cracker crumbs and granulated sugar. Pour in the melted butter and mix thoroughly with a fork or your hands until the crumbs are evenly moistened.
- Press the mixture firmly and evenly into the bottom and up the sides of a 9-inch pie plate. You can use the bottom of a glass or a measuring cup to help compact the crust. Place the crust in the refrigerator to chill while you prepare the filling, for at least 15 minutes.
- In a large mixing bowl, beat the softened cream cheese with an electric mixer on medium speed until smooth and creamy, about 1-2 minutes. Scrape down the sides of the bowl as needed.
- Add the creamy peanut butter, sifted powdered sugar, and vanilla extract to the cream cheese mixture. Beat on medium speed until well combined and smooth, about 2-3 minutes. The mixture will be thick.
- In a separate, clean large bowl, pour the cold heavy cream. Beat with an electric mixer on high speed until stiff peaks form, about 3-5 minutes. Be careful not to overbeat, or it will turn into butter.
- Gently fold about one-third of the whipped cream into the peanut butter mixture to lighten it. Then, fold in the remaining whipped cream until no streaks remain and the filling is light and airy. Do not overmix.
- Pour the peanut butter filling into the chilled graham cracker crust. Spread evenly with a rubber spatula.
- Cover the pie loosely with plastic wrap and refrigerate for at least 4 hours, or preferably overnight, until the pie is firm and set.
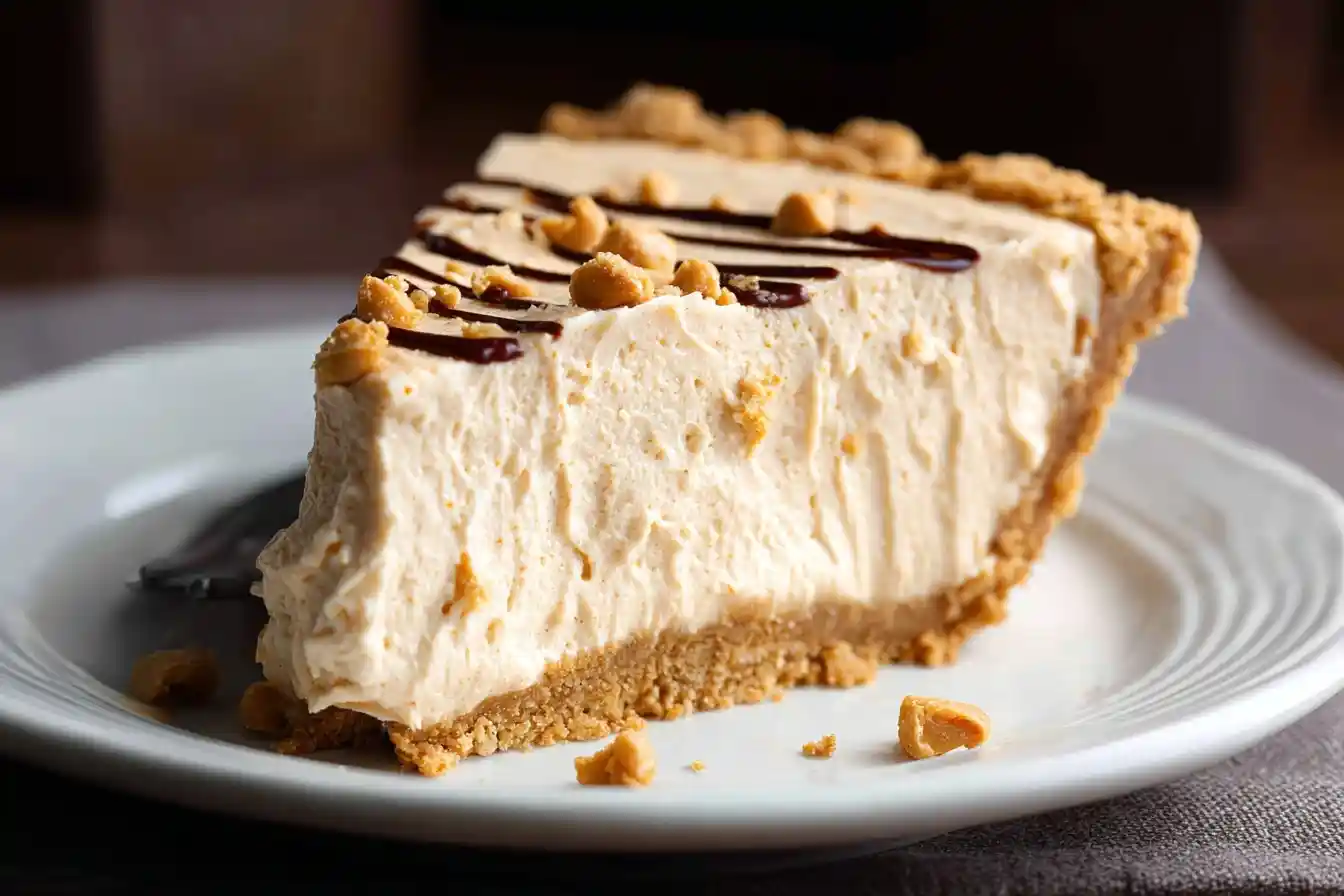
- Before serving, top the pie with additional whipped cream and sprinkle with chocolate shavings or chopped mini peanut butter cups.
- Slice and serve cold. Enjoy!
Notes
Pro Tips for Making This Peanut Butter Pie
Creating the perfect no-bake Peanut Butter Pie is all about a few simple tricks I’ve learned over the years. These tips ensure your pie is wonderfully creamy, perfectly set, and utterly irresistible every time.
My Secret Trick: I always make sure my cream cheese is at true room temperature. This isn’t just a suggestion; it’s essential for a smooth, lump-free filling that blends beautifully with the peanut butter and powdered sugar, giving your Peanut Butter Pie that dreamlike texture we all crave.
For the crust, really press those graham cracker crumbs firmly into the pie plate. Use the back of a spoon or the bottom of a glass to get a compact, even layer. This prevents your crust from crumbling when you cut into your delicious pie.
When whipping your heavy cream, ensure both the cream and your mixing bowl are very cold. This helps the cream whip up faster and achieve those stiff peaks that add such lightness and airiness to the peanut butter filling, making it truly divine.
Don’t rush the chilling process! While it might be tempting to peek, allow the pie to chill for at least 4-6 hours, or even better, overnight. This is crucial for the Peanut Butter Pie to set properly, ensuring clean slices and a stable, creamy texture.
Fun Variations for Peanut Butter Pie
One of the most delightful things about baking, for me, is the freedom to play and personalize. This Peanut Butter Pie is a fantastic canvas for your own creative twists!
Different Toppings
While chocolate shavings are classic, why not try a drizzle of melted chocolate, a sprinkle of mini chocolate chips, or even some crushed peanut butter cups on top? My friend always asks for a generous sprinkle of sea salt flakes – the sweet and salty combination is simply divine!
Cookie Crust Swap
Instead of chocolate graham crackers, you could use Oreo cookies for an even richer chocolate flavor, or even vanilla wafers for a lighter, more subtle base. I once made this pie with a shortbread cookie crust, and it was a delightful change of pace.
Flavor Swirls
For an extra layer of flavor, consider swirling a little raspberry jam or a caramel sauce into the peanut butter filling before chilling. My sister always asks for a raspberry swirl, saying it adds a beautiful fruity tang that complements the peanut butter perfectly.
What to Serve With Peanut Butter Pie
This creamy, dreamy Peanut Butter Pie is truly a star on its own, but sometimes a little something extra can make the experience even more special. Think of these as little companions that elevate its rich flavors.
I absolutely adore serving a slice of this Peanut Butter Pie with a scoop of homemade vanilla bean ice cream. The cool, creamy ice cream is a perfect contrast to the rich peanut butter filling, and it’s a pairing that always brings smiles.
For a refreshing touch, fresh berries like sliced strawberries or raspberries are wonderful. Their slight tartness cuts through the richness beautifully, and their vibrant color adds a lovely pop to your dessert plate. My mom always pairs it with a steaming mug of hot cocoa on a chilly evening – pure comfort!
And for the adults, a freshly brewed cup of coffee or a warm herbal tea can be the perfect ending to a meal alongside a generous slice of this decadent Peanut Butter Pie. It just feels complete, like a warm hug in a cup.
How to Store Peanut Butter Pie
Keeping your Peanut Butter Pie fresh and delicious for as long as possible is key to enjoying every last bit! Proper storage ensures that delightful creamy texture and rich flavor last.
Refrigerator Storage
Since this is a no-bake, cream-based dessert, it needs to be kept refrigerated. Store any leftover Peanut Butter Pie tightly covered with plastic wrap or in an airtight container in the fridge for up to 3-4 days. I always find that keeping it covered prevents any unwanted odors from permeating the delicate flavors and keeps it from drying out.
Freezer Tips
If you’d like to enjoy this treat even longer, you can freeze individual slices or the whole pie! Wrap the pie or slices tightly in plastic wrap, then an additional layer of aluminum foil. It will keep well in the freezer for up to one month. To serve, simply thaw slices in the refrigerator for a few hours until soft enough to enjoy, or eat it slightly frozen for a delicious, almost ice-cream-like treat!
Nutritional Benefits
While this Peanut Butter Pie is undoubtedly an indulgence, it does offer a few delightful highlights! Peanut butter, at its heart, provides a good source of plant-based protein and healthy fats, which contribute to a feeling of satiety. Coupled with the richness of dairy, it creates a satisfying treat that’s both comforting and offers some beneficial nutrients, perfectly aligning with my philosophy of combining wholesome ingredients with joyful indulgence.
FAQs
Faq 1
Can I use a store-bought crust for this pie?
Absolutely! Using a pre-made chocolate cookie or graham cracker crust is a fantastic time-saver. Just ensure it’s a 9-inch crust for this Peanut Butter Pie recipe.
Faq 2
How long does this pie need to chill before serving?
This no-bake wonder needs at least 4-6 hours in the refrigerator to set properly. For the best, firmest slices of Peanut Butter Pie, I always recommend chilling it overnight.
Faq 3
Can I make this pie ahead of time for a party?
Yes, you certainly can! This Peanut Butter Pie is an excellent make-ahead dessert. Prepare it the day before your event, keep it chilled, and it will be perfectly set and ready to impress.
Faq 4
What kind of peanut butter works best for the filling?
For the creamiest, dreamiest Peanut Butter Pie, I highly recommend using a smooth, processed creamy peanut butter (like Jif or Skippy) rather than natural peanut butter, as it helps achieve the ideal texture.
Conclusion
There’s truly nothing quite like the satisfaction of creating a beautiful, delicious dessert with your own hands, especially one as effortlessly delightful as this No-Bake Peanut Butter Pie with a Chocolate Cookie Crust. It embodies everything I love about baking: simple ingredients transforming into something magical, creating moments of pure joy, and most importantly, bringing people together around the table. So, gather your ingredients, follow along with love and patience, and get ready to create sweet memories that will last a lifetime. Happy baking, my friends!